Last reviewed October 29, 2026 · Dr. Ilseop Ahn (board-certified periodontist and board-certified specialist in advanced general dentistry)
At a glance
Good for
A medium-sized or larger cavity in a molar
Treatment flow
Remove decay and check remaining walls → Impression → Bond the inlay
Duration and limits
Usually two visits. For teeth with thin side walls or cracks, a crown is safer
Details
An inlay is used for a cavity in a molar that is medium-sized or larger. After the decay is removed, we take an impression of the space and make a hard piece outside the mouth to bond in place. It usually takes two visits. For small cavities, resin requires less drilling. For teeth with thin remaining side walls or cracks, a crown is the safer choice. At Ceramic Dental Clinic, after removing the decay, we look directly at the thickness of the remaining walls and the cusps of the biting surface, and decide on the spot whether an inlay is enough.
01°
We looked at the remaining tooth walls first to see whether a crown could be avoided
Even for the same molar cavity, the remaining walls after decay removal decide between resin, an inlay, or a crown. Here are cases treated with an inlay and a case where the plan changed.
CASE01
A cavity between two molars
Inlay · After removing the decay between the teeth, enough wall remained, so an inlay instead of a crown
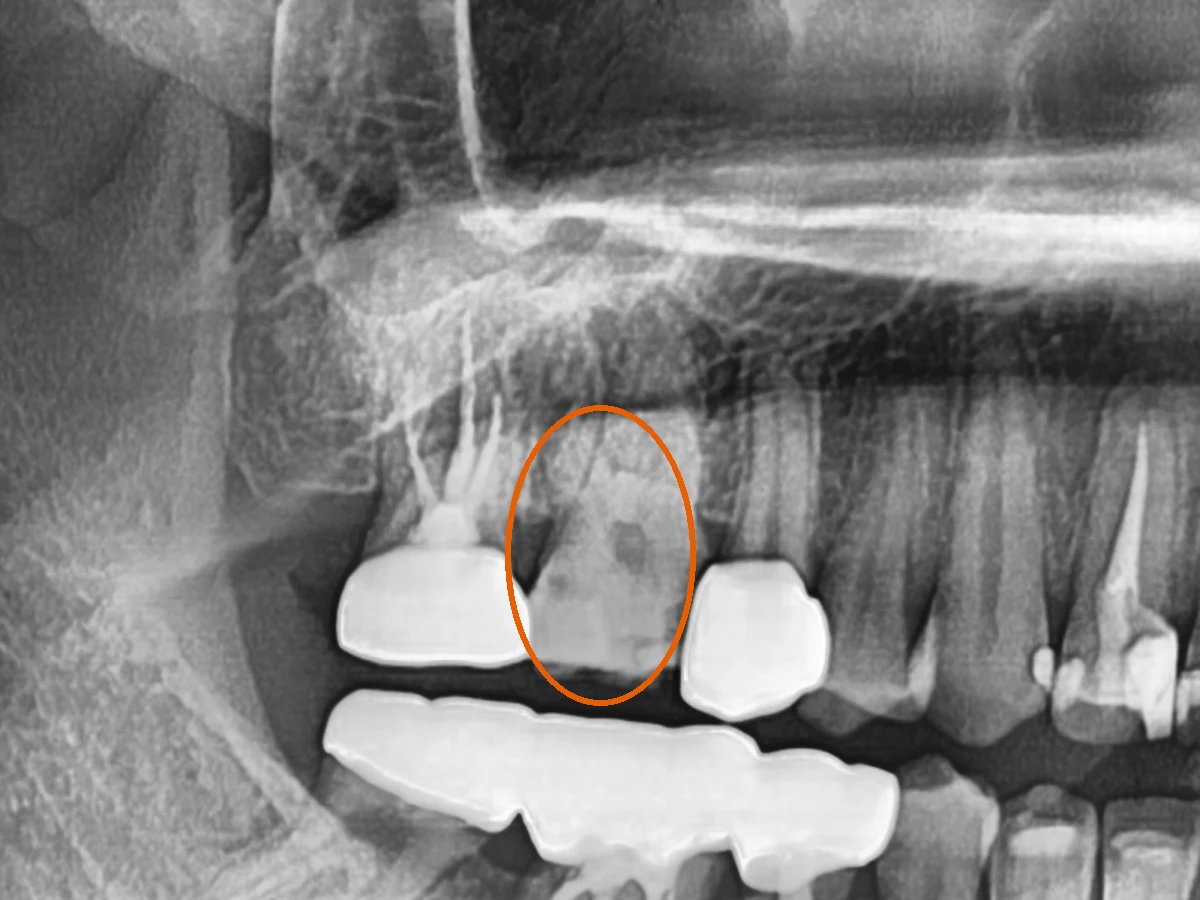
X-ray before treatment · April 2026
Panoramic X-ray before treatment. The upper first molar (circled) had a large old filling.
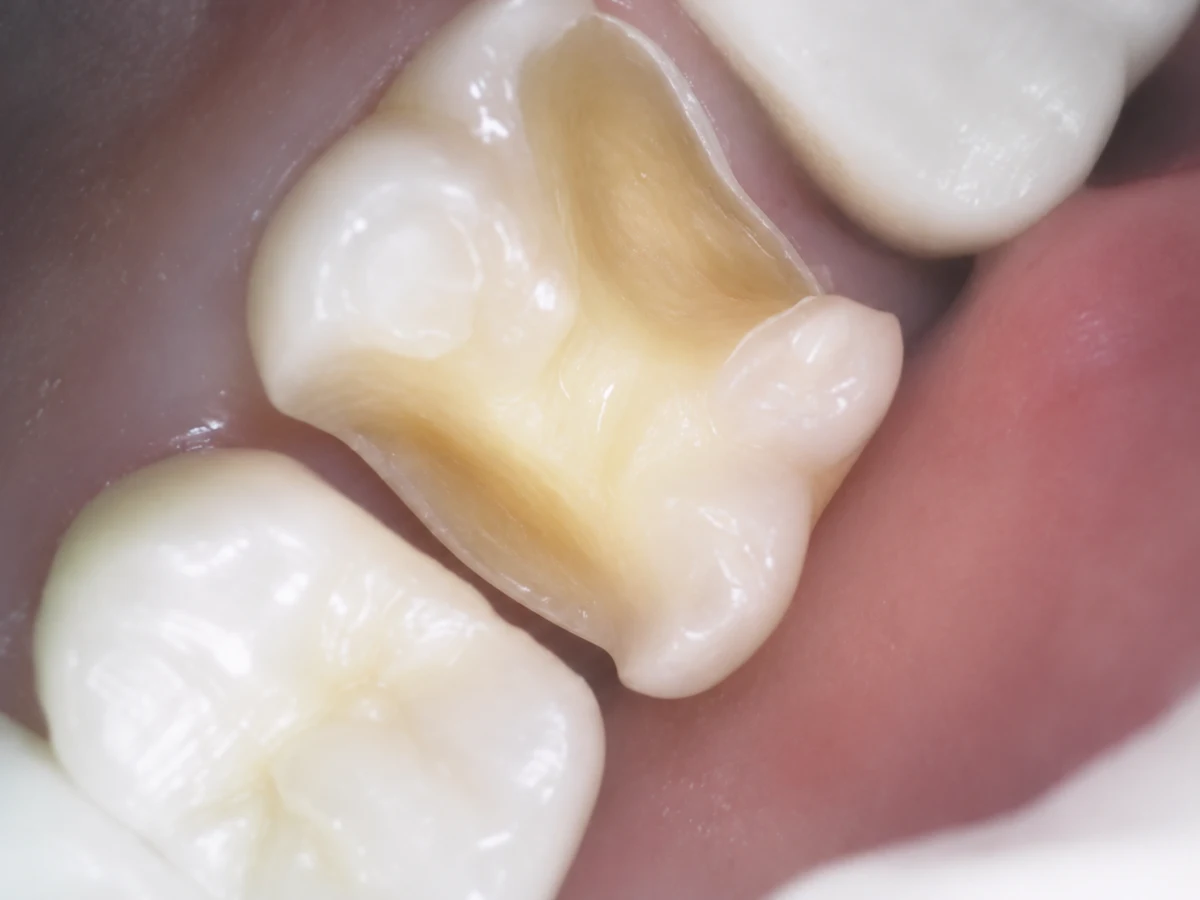
After shaping · April 2026
Right after removing the decay. The outer and inner walls and the cusps of the biting surface remained thick, so we chose an inlay.
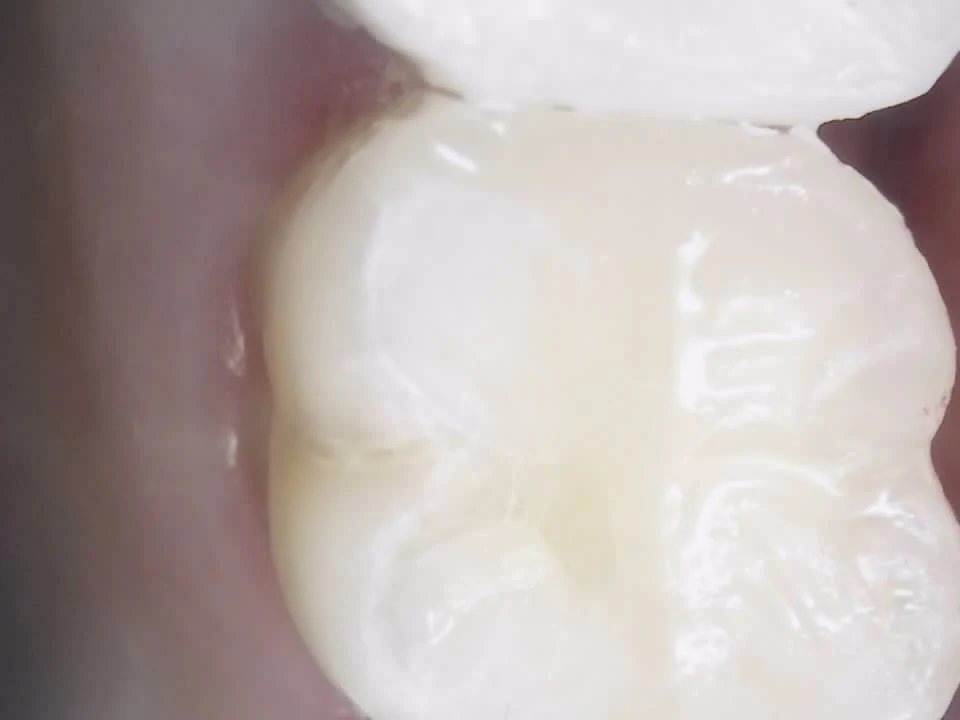
After treatment · May 2026
After the inlay was bonded. We matched the surface that touches the neighboring tooth so food would not get stuck.
Condition
Cavity between two molars reaching the dentin, no cracks
Chosen
Hybrid inlay
Not done
Crown (walls and cusps remained, so there was no reason to trim the whole tooth)
Duration
2 visits (1–2 weeks apart)
Note
Clean the edge between the teeth with floss, and we check with an X-ray every year.
CASE02
New decay under an old resin or amalgam filling
Inlay replacement · Removed an old filling with open edges, removed the decay underneath, then placed an inlay
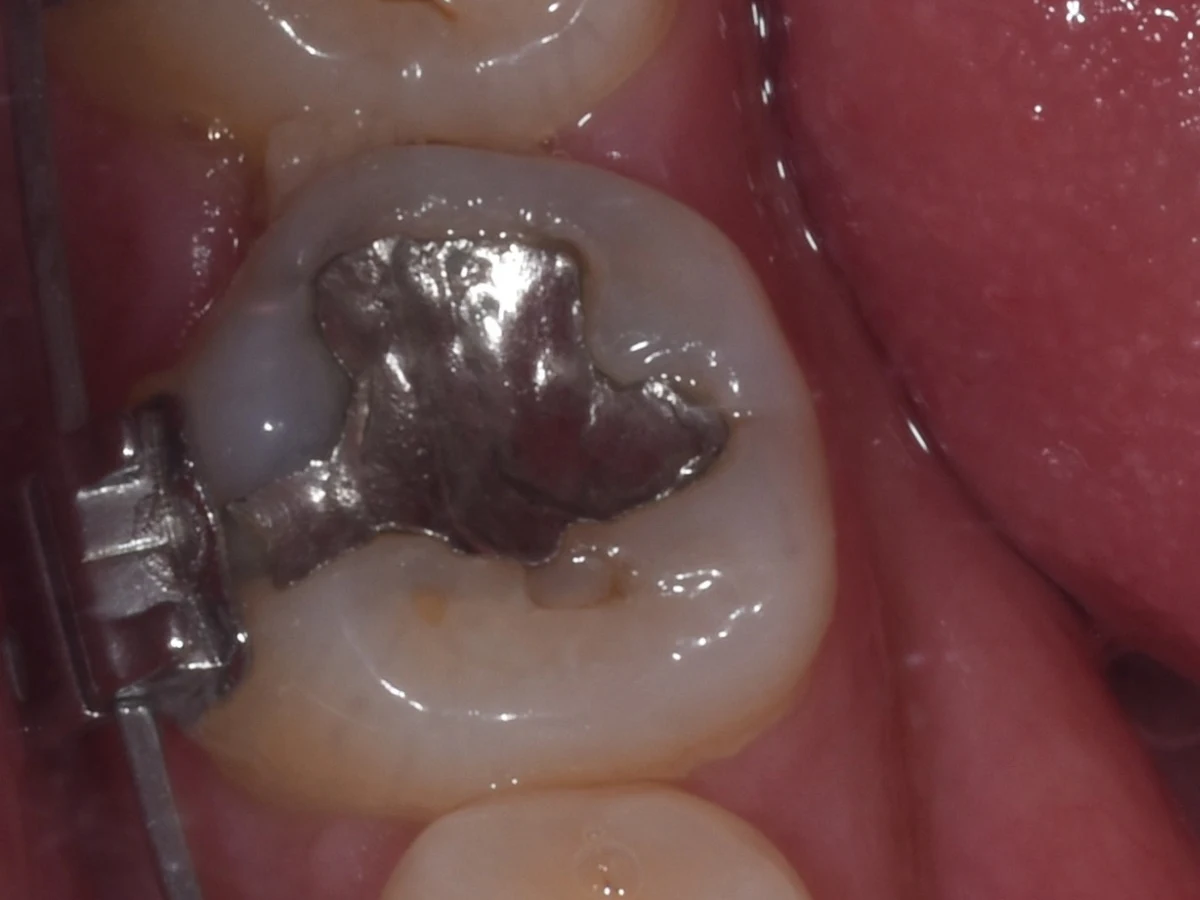
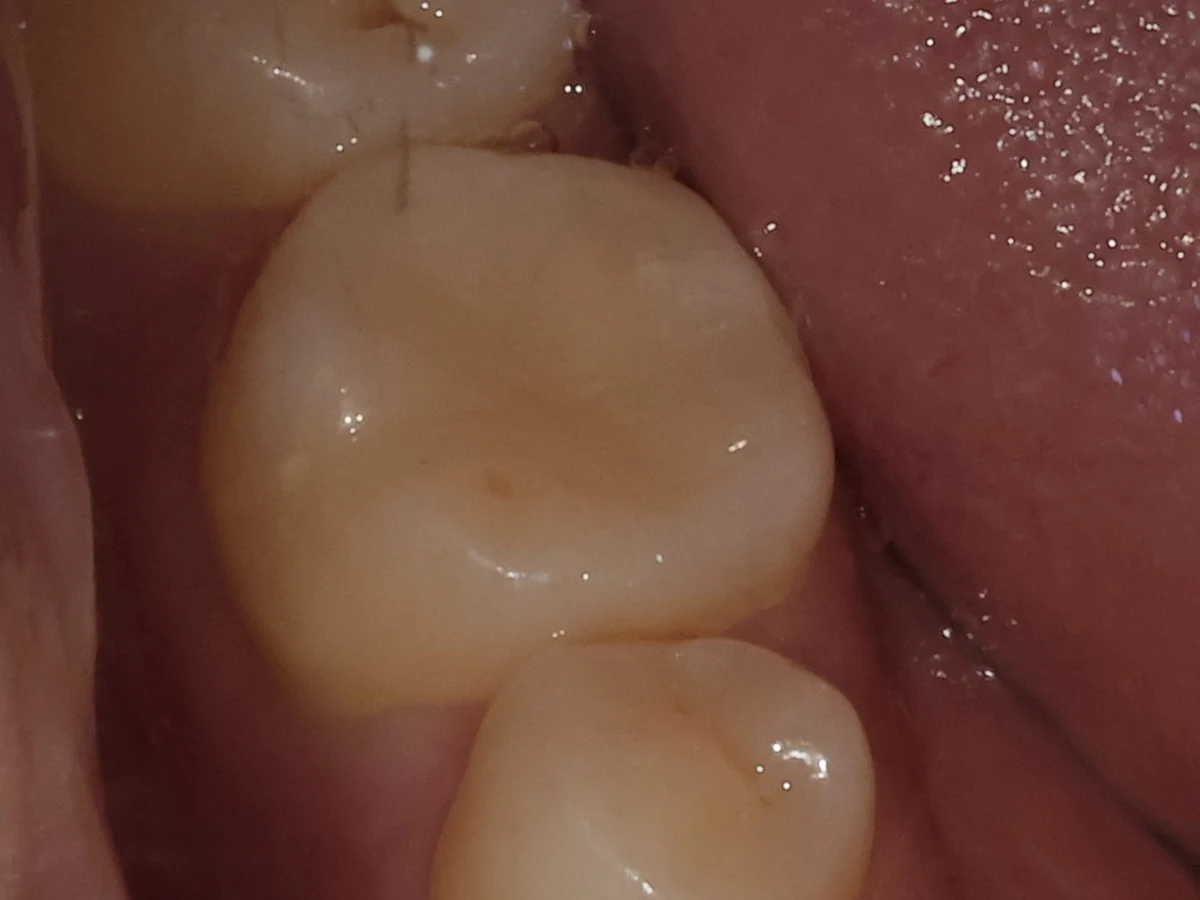
Before treatment · February 2025
Before treatment. The edges of the old filling had turned dark and opened up, and decay had started again underneath.
After · Mar 2026
After the inlay replacement. We removed the old filling, removed only the decay underneath, and bonded the inlay so the edges join smoothly.
Condition
Open edges on an old filling with secondary decay underneath
Chosen
Removed the old filling and secondary decay, then placed an inlay
Not done
Replacing the gold crown on the neighboring tooth, which had no problems (no gaps or decay, so it was left as is)
Duration
2 visits (1–2 weeks apart)
Note
If decay had reached deep near the nerve, sensitivity could last a few weeks after treatment, so we monitored progress.
CASE03
A molar with an inlay changed to a crown
Crown · Problems were seen at the inlay edge and the remaining walls were thin, so we changed to a crown that covers the whole tooth
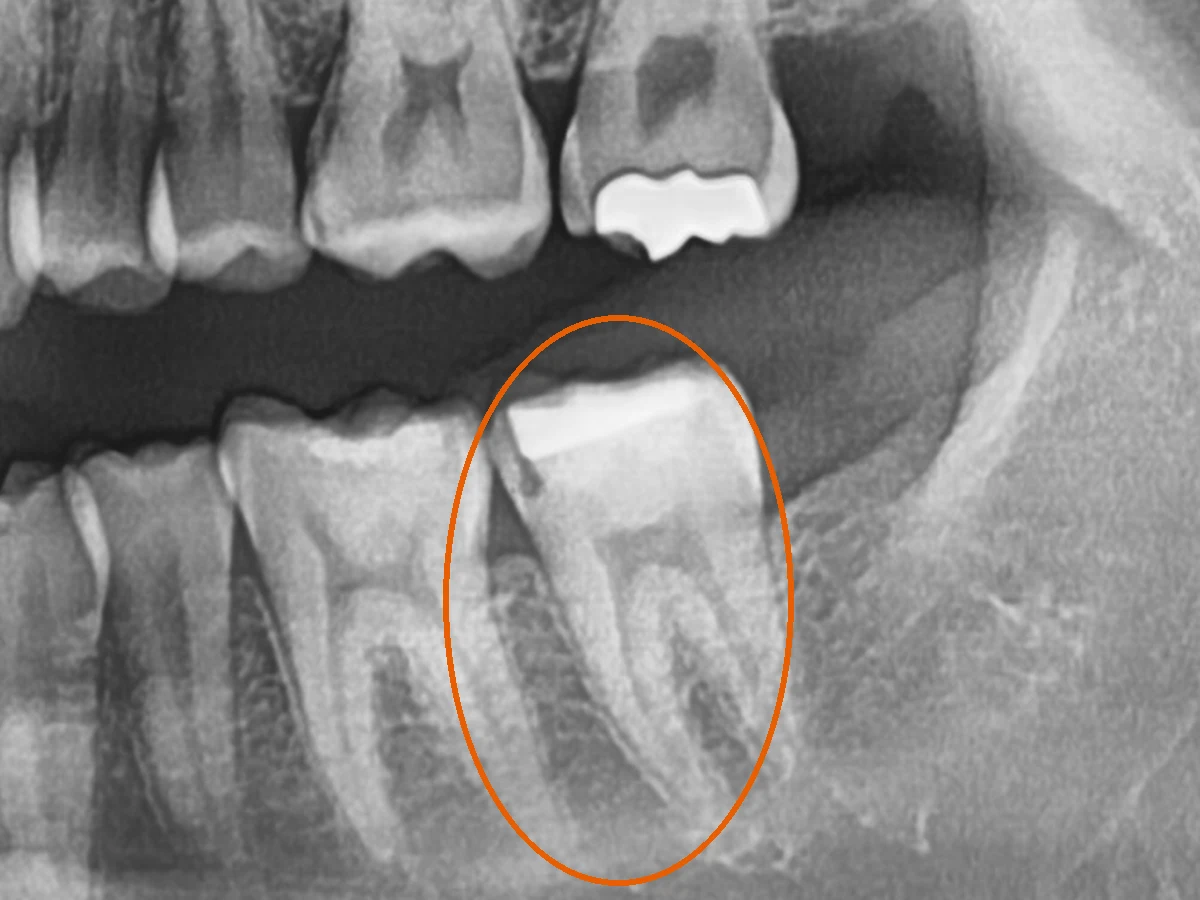
X-ray before treatment · May 2026
X-ray before treatment. An inlay placed earlier is visible in the last lower molar (circled).
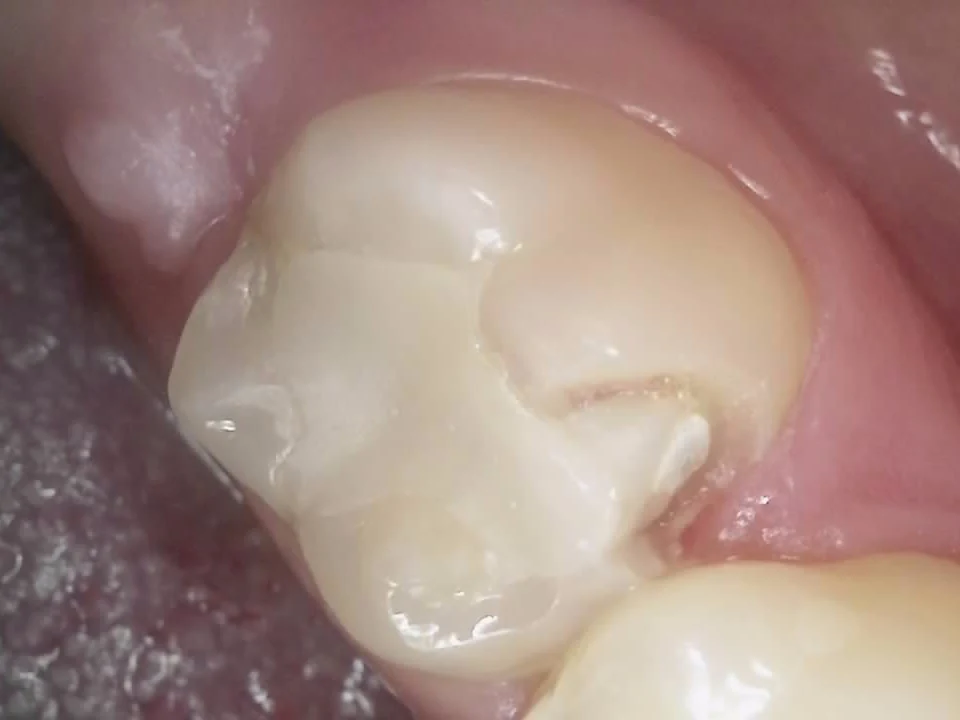
Before · May 2026
Before treatment. A line was visible along the inlay edge, and the remaining tooth walls were too thin, so we changed to a crown.
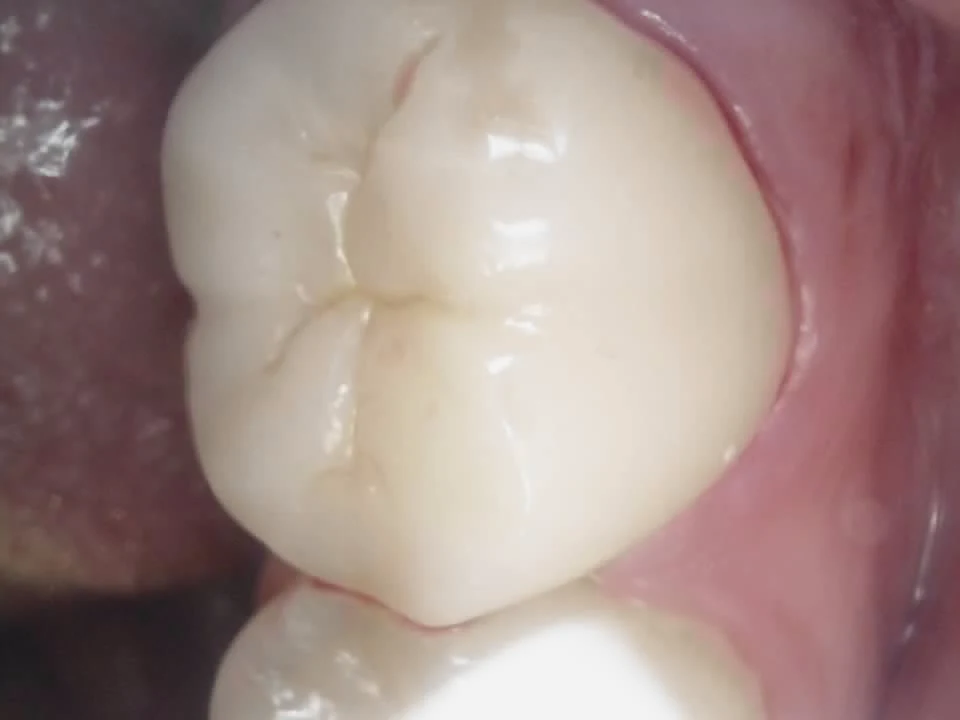
After treatment · May 2026
After the crown was placed. We removed the inlay and covered the remaining walls in one piece so chewing force would not concentrate on one wall.
Condition
Problems seen at the edge of an inlay placed in 2025
Chosen
Removed the inlay and changed to a zirconia crown
Not done
Redoing the inlay (high risk that the remaining walls would break under chewing force)
* Photos were taken under the same conditions and published with the patients' consent. Treatment results and side effects may vary from person to person.
02°
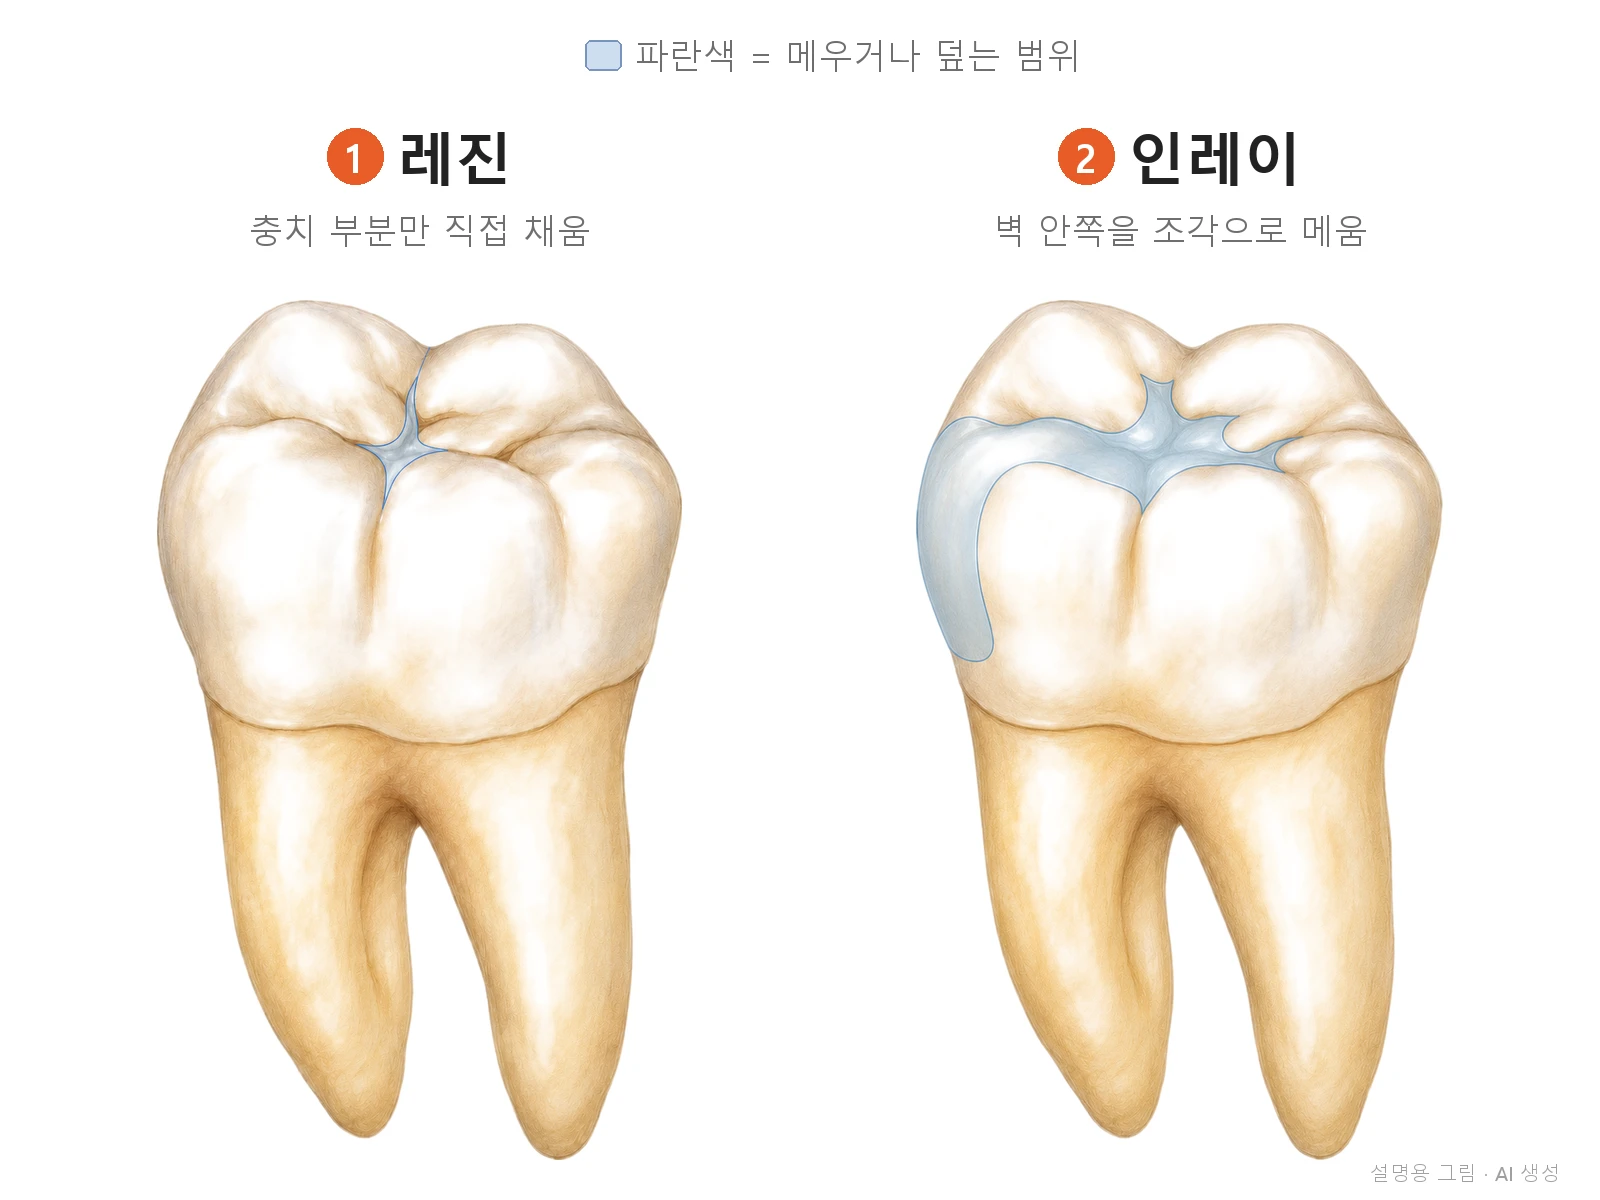
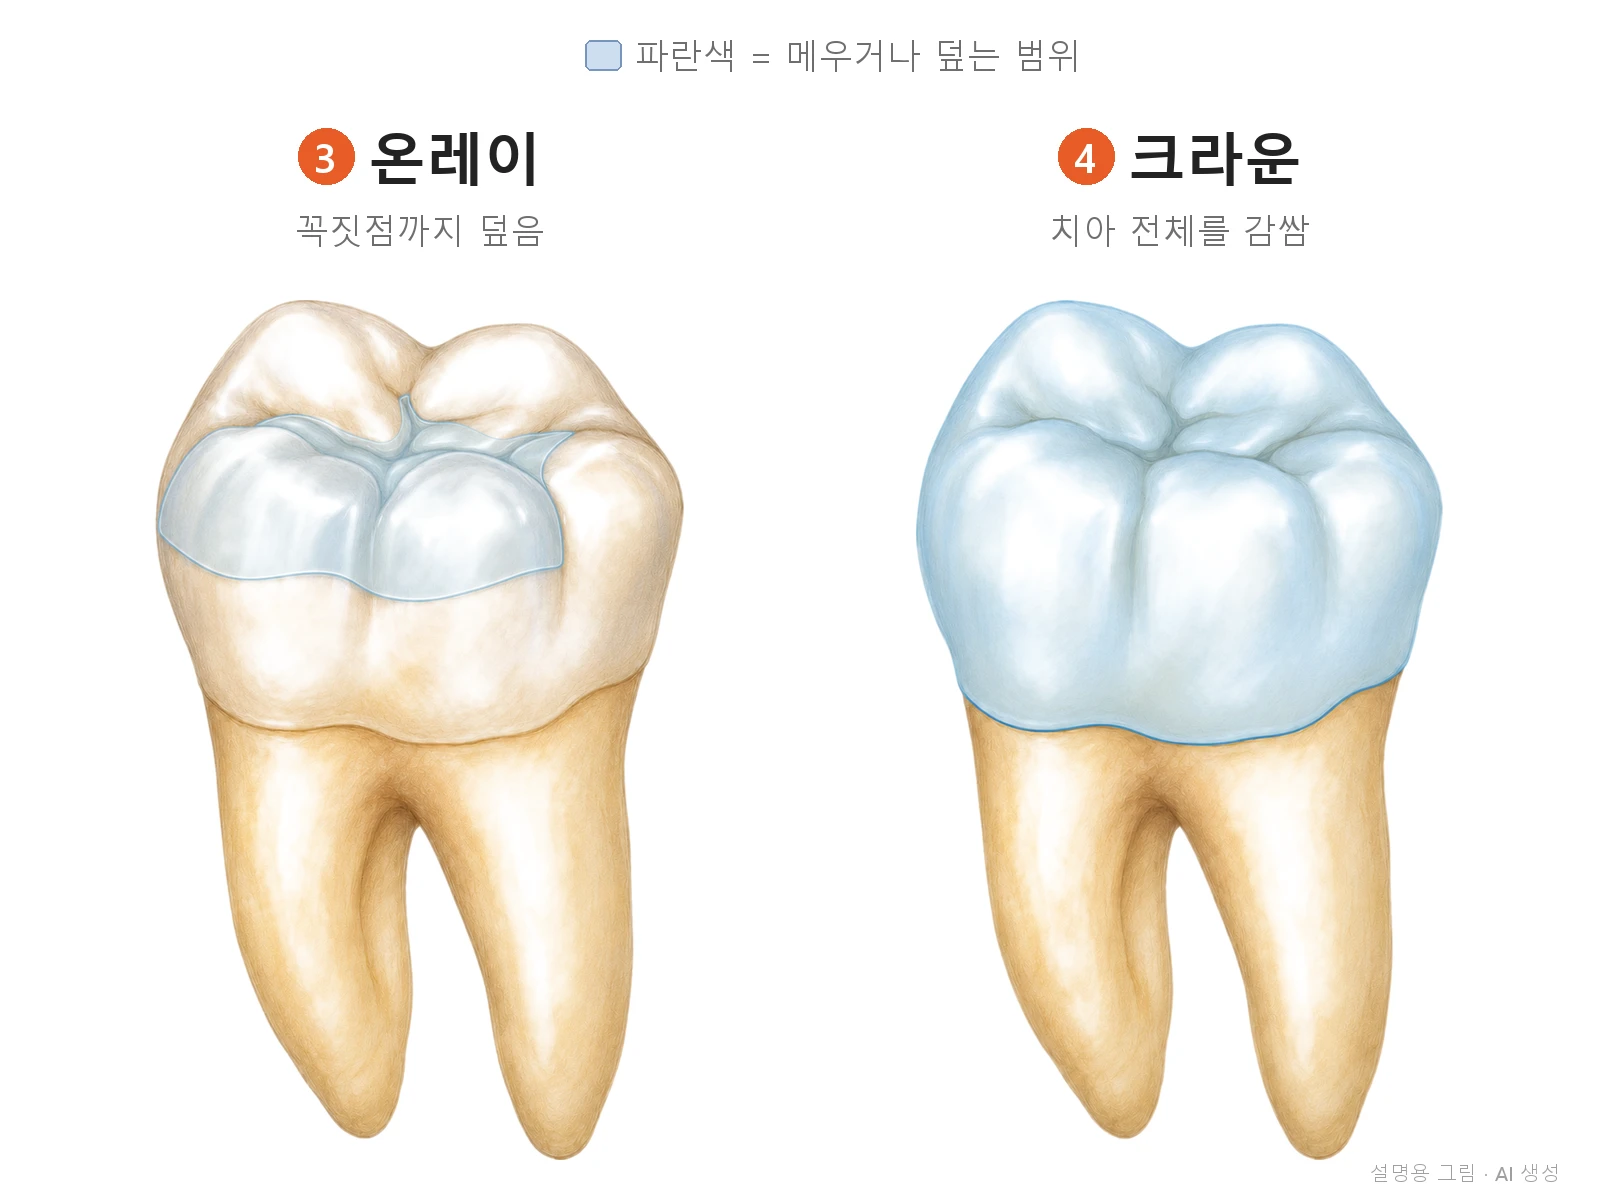
Resin, inlays, onlays, and crowns cover different areas
The more tooth that is lost after removing decay, the wider the area to be filled. A wider restoration holds the tooth more firmly, but it also requires more trimming.
01Resin
For a small cavity, tooth-colored material is filled directly in the mouth and hardened with light. Only the decayed part is removed, so it requires the least drilling.
02Inlay
A large cavity inside the walls, such as in the middle of the biting surface or between teeth, is filled with a piece made outside the mouth from an impression of the space.
03Onlay
Wider than an inlay, it covers one or more cusps of the biting surface. It is used when the cusps are weakened but the whole tooth does not need to be covered. We also do onlays when needed.
04Crown
The outside of the tooth is trimmed evenly and covered entirely. It is used for molars with thin walls, cracks, or a root canal treatment.
Resin · Inlay
Onlay · Crown
Coverage comparison. Resin and inlays cover only inside the walls, onlays reach the cusps, and crowns cover the whole tooth.
03°
How inlay treatment works
It usually takes two visits. On the first day, we remove the decay and take an impression. At the next visit, we check the fit and bond the inlay.
Examination
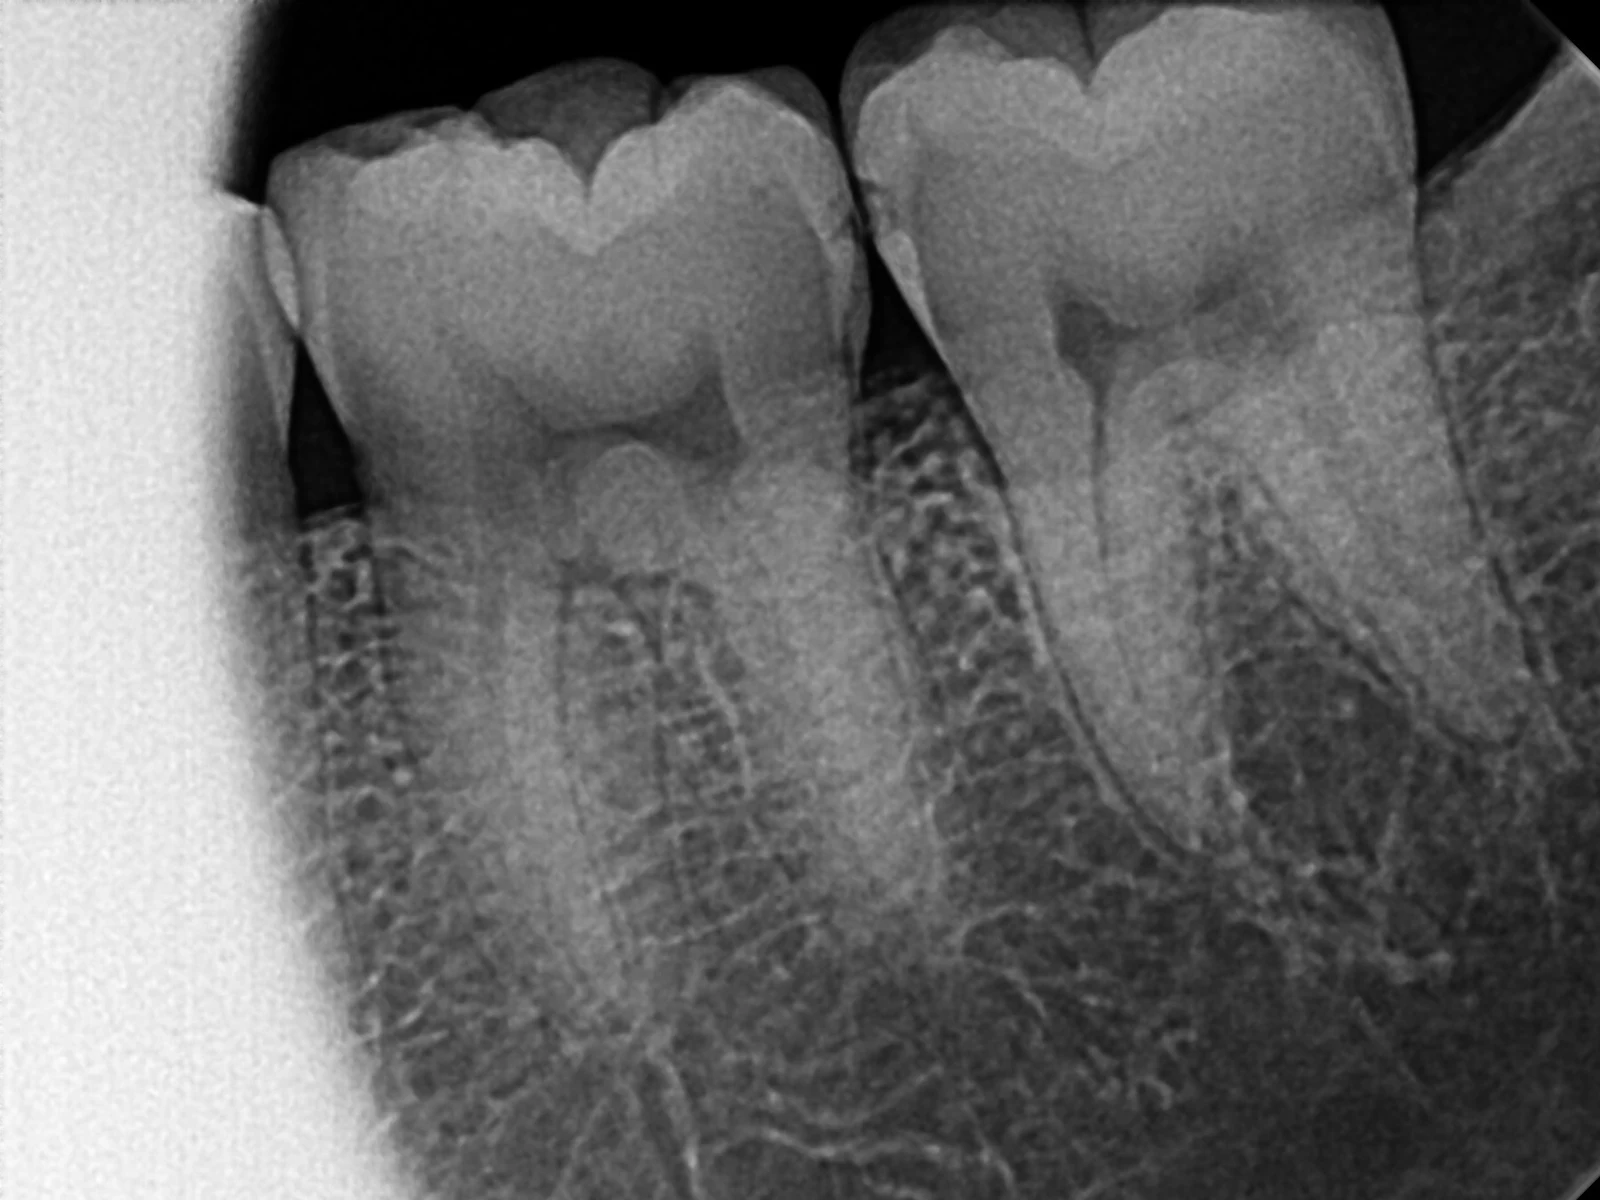
Periapical X-ray. We see how far the decay has gone into the dentin and how close it is to the nerve space.
STEP 01
We check the depth of the decay and its distance to the nerve with an X-ray
With a periapical X-ray, we check whether the decay is between the teeth, how far into the dentin it has gone, and how close it is to the nerve space. We also ask how sensitive the tooth is to cold and whether it hurts when you bite.
Why we do thisIf the decay is very close to the nerve, nerve inflammation may develop after the inlay is bonded. If we see this possibility, we tell you before treatment.
Decay removal and decision
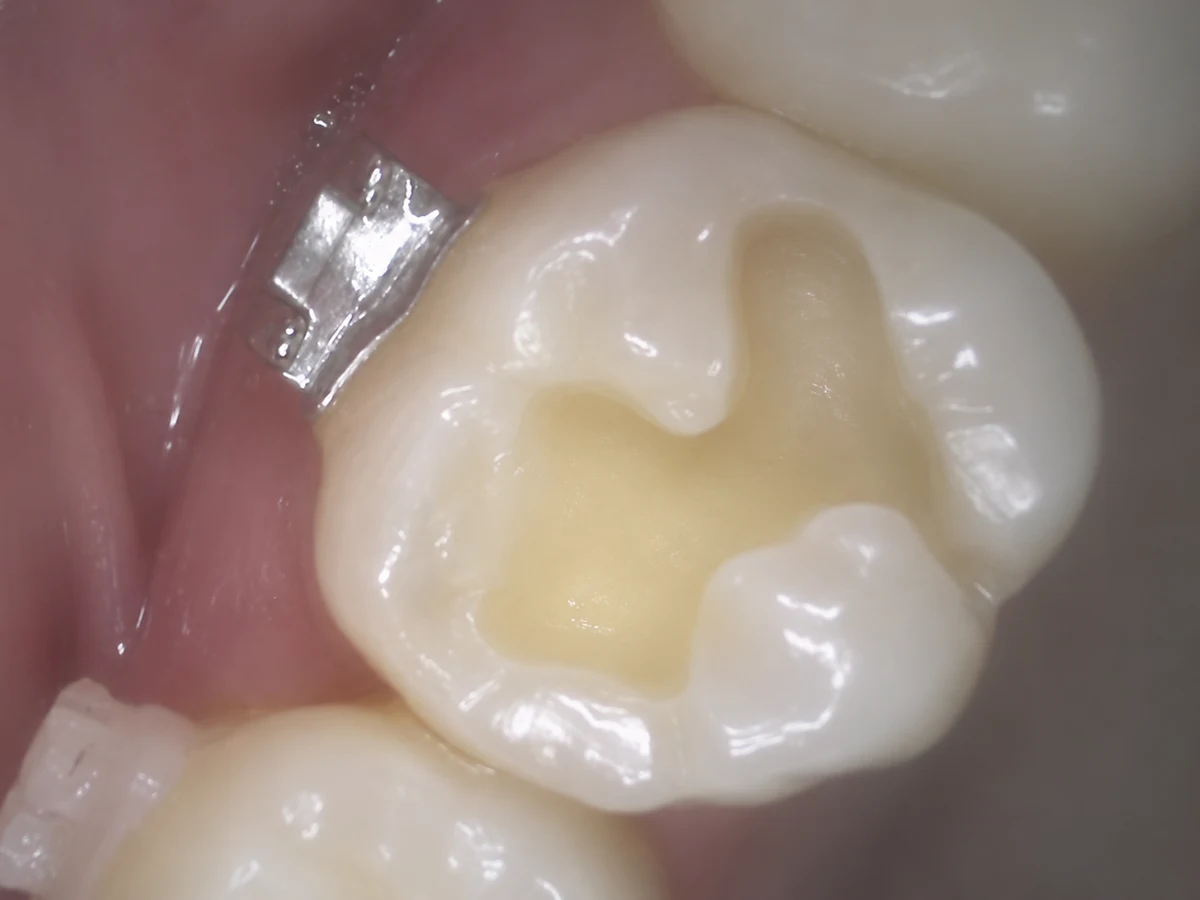
Right after removing the decay. We look directly at the remaining wall thickness and any cracks, and make the final choice between an inlay and a crown.
STEP 02
We make the final decision based on the walls remaining after decay removal
After anesthesia, we remove the soft decay. If the remaining side walls are thick enough, the cusps are intact, and there are no cracks, we proceed with an inlay. If the walls are thin or cracks are visible, we show you on the spot and explain that changing to a crown is better. It depends on the surrounding walls, but in general, if any remaining wall is 2mm thick or less, we consider the risk of breaking to be high.
Why we do thisAn inlay lasts longer when the remaining tooth walls support it. If an inlay is bonded to thin walls, they can split under chewing force, which may eventually lead to a crown or even extraction.
Impression and scan
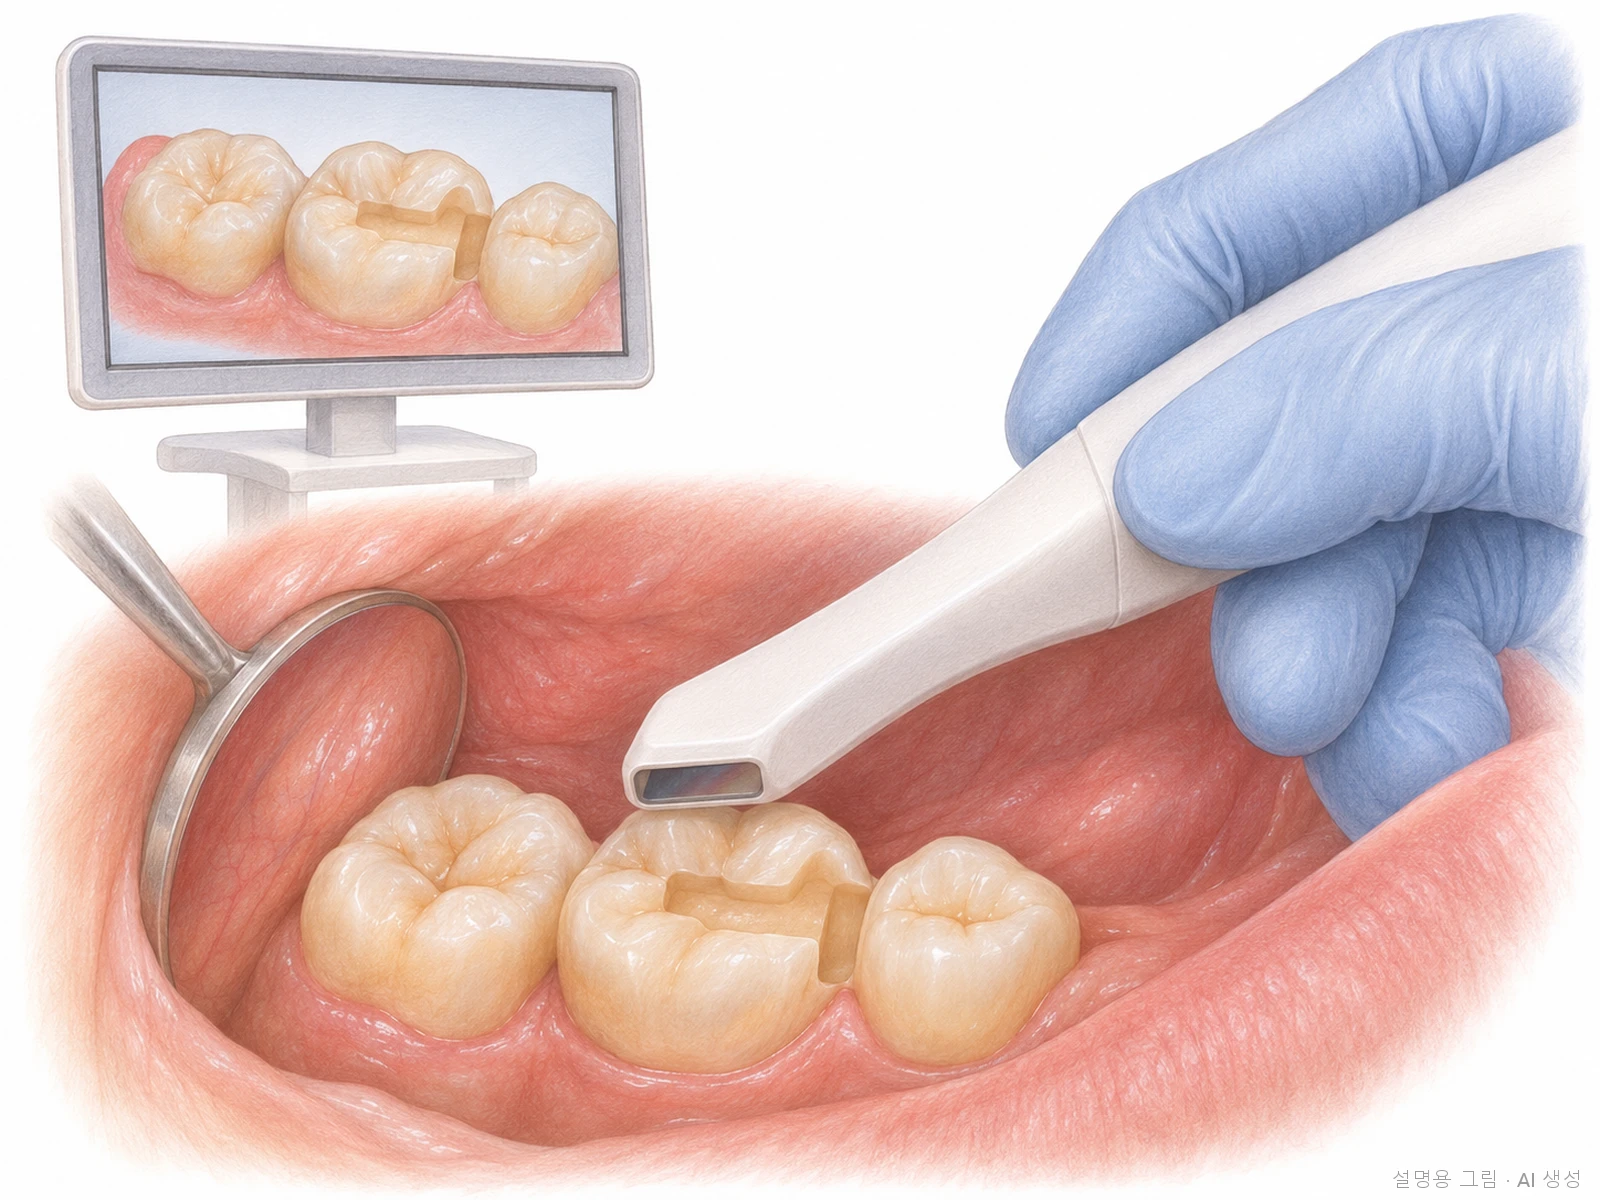
Impression of the inlay site. We record the shape of the prepared area together with the neighboring teeth and the opposing teeth.
STEP 03
We shape the tooth, take an impression, and seal it temporarily
We shape the inside so the inlay fits in without coming out, then make a model with an iTero intraoral scan or an impression. While it is being made, the tooth is sealed with temporary material, and you usually come back 1 week later to have it bonded.
Why we do thisWithout a temporary seal, the prepared area can feel sensitive, food can get in, and neighboring teeth can shift slightly so the inlay may not fit. During the temporary period, please avoid sticky foods.
Fit check
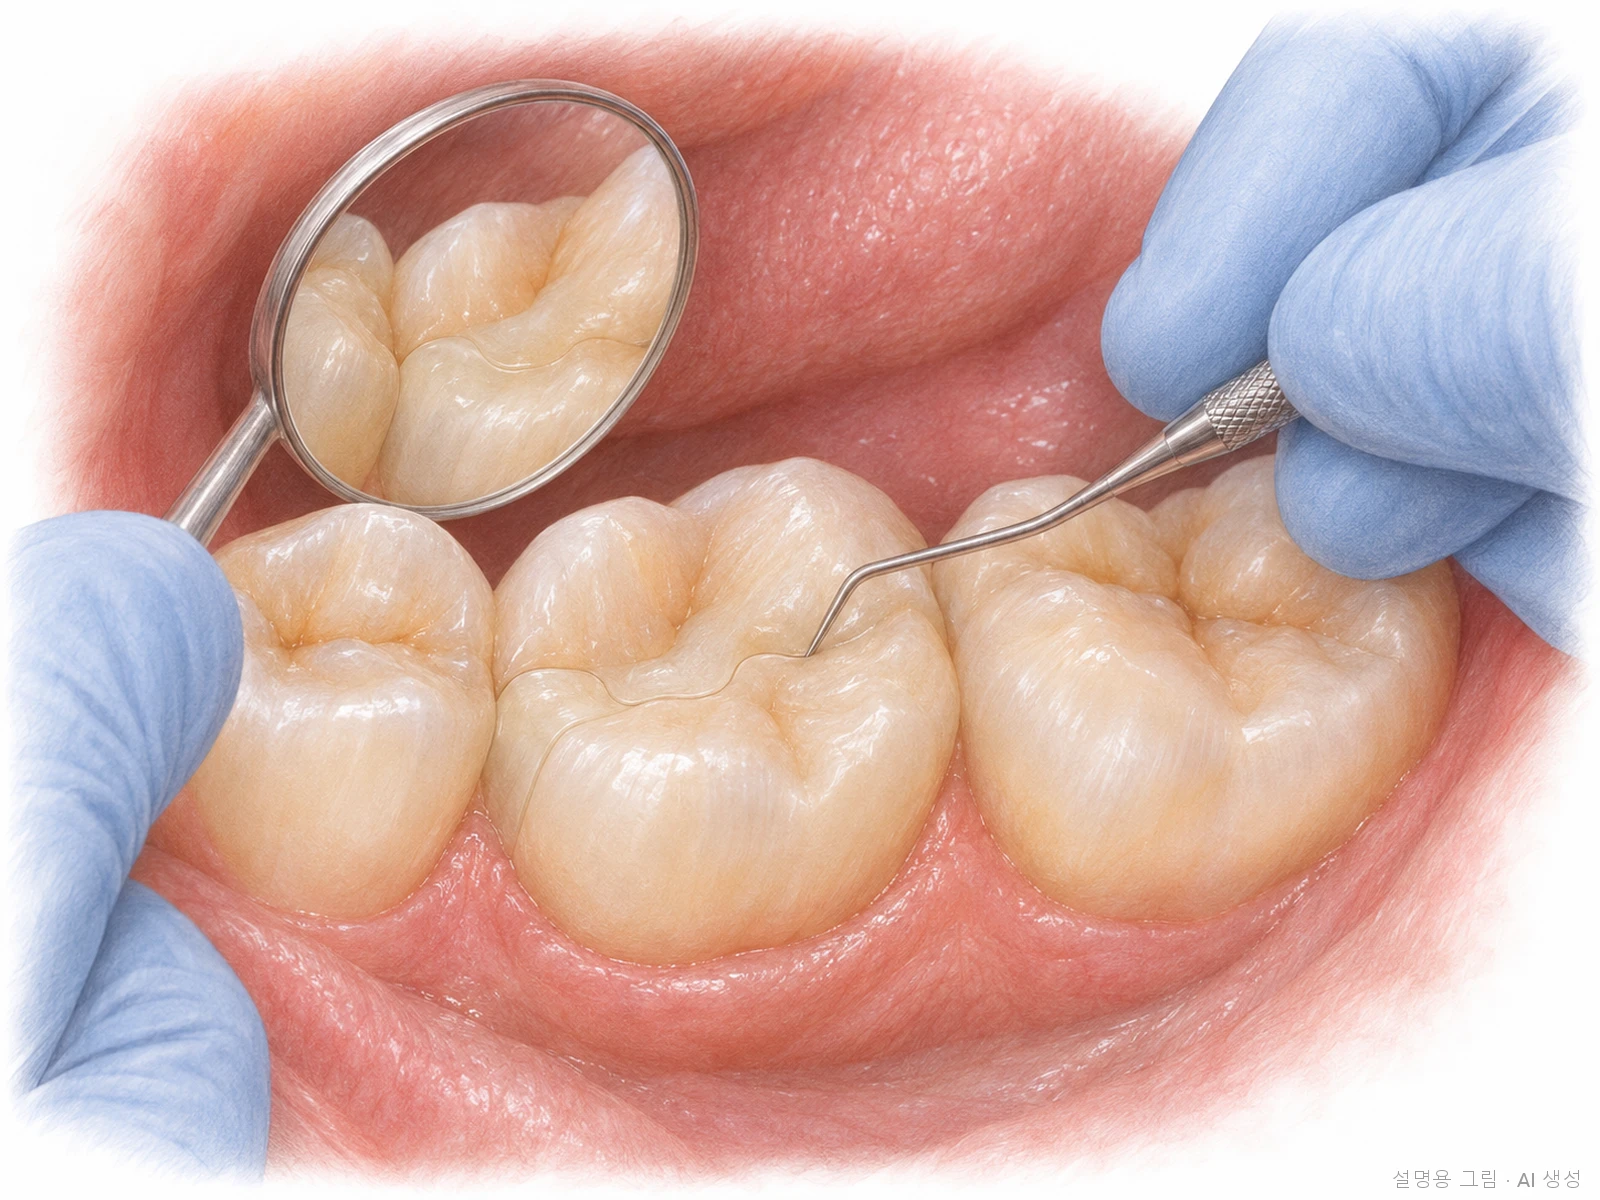
Trial fit before bonding. We check that there are no gaps at the edges and that floss passes with the right amount of resistance.
STEP 04
Before bonding, we check the edges, contacts, and height
We first try in the finished inlay and check that there are no gaps at the edges and that the surface touching the neighboring tooth is neither too loose nor too tight. If it fits, we treat the tooth surface and bond the inlay with adhesive.
Why we do thisA small gap at the edge becomes an entry point for new decay. If the contact with the neighboring tooth is loose, food such as meat gets stuck, making the gums swell and decay between teeth more likely.
Bite adjustment
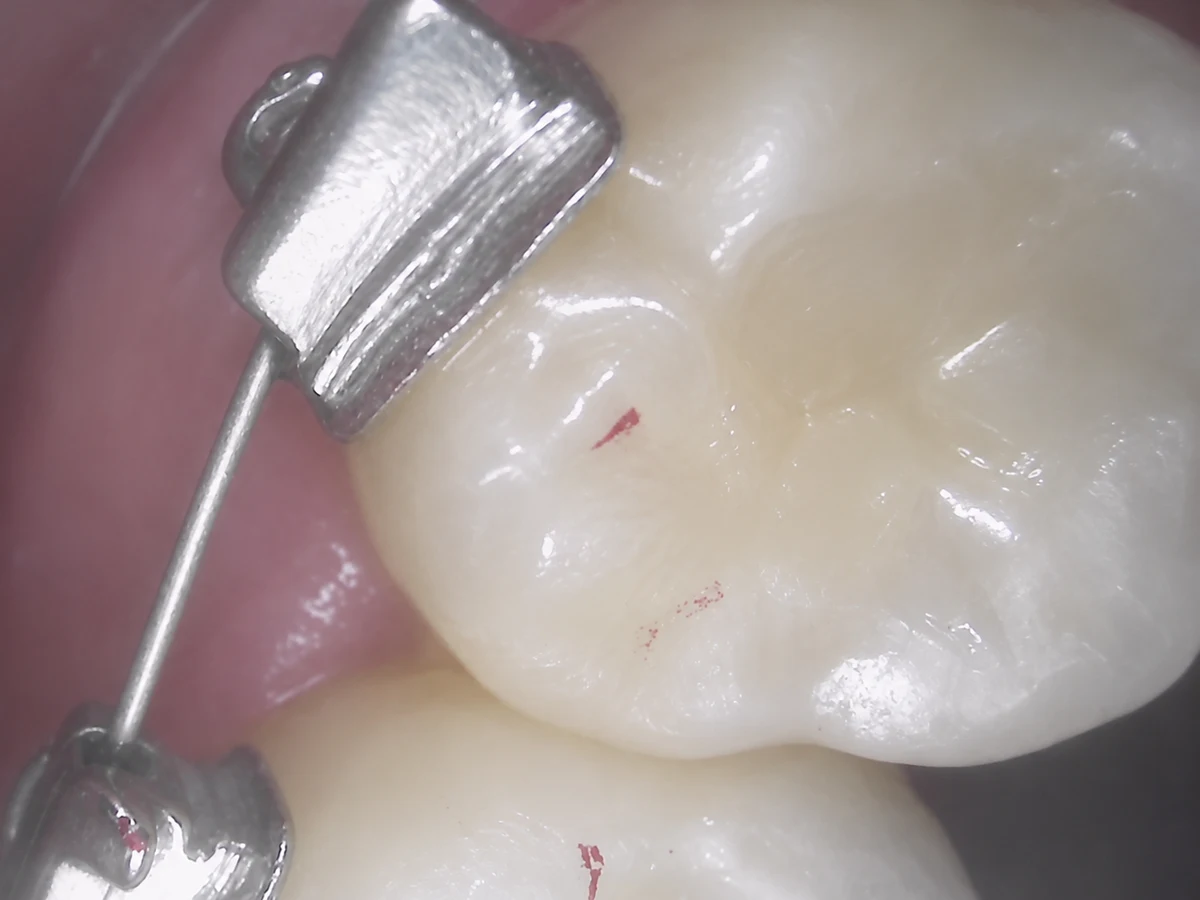
Checking the height with articulating paper after bonding. Where high spots show up in color, we smooth them down.
STEP 05
We adjust the biting height and check the edges at regular check-ups
After bonding, you bite on articulating paper and we smooth any high spots. Later, at regular check-ups, we check the edges for discoloration or gaps and check between the teeth with X-rays.
Why we do thisEven a slightly high spot makes that tooth touch first when you bite, which can cause sensitivity or pain and may break the inlay or the tooth. Even if it feels fine on the day, if it feels high after a few days of chewing, we adjust it again.
* Clinical photos were published with the patients' consent. Side effects such as temporary pain or discomfort may occur depending on the person.
04°
How we choose between an inlay and a crown
We decide by whether the tooth remaining after decay removal can support an inlay. We look at the four points below together.
Side wall thickness · The outer and inner walls must remain thick to support an inlay.
Cusps of the biting surface · If the cusps are intact, an inlay; if the cusps are weakened, we cover a wider area.
Cracks · If cracks are visible, a crown that covers the whole tooth is safer than an inlay.
Root canal treatment · A molar with a root canal treatment is weakened, so we usually recommend a crown.
05°
Comparing inlay materials
Resin (direct filling)
Hybrid inlay
Ceramic inlay
Gold inlay
Color
Tooth-colored
Tooth-colored
Tooth-colored, little discoloration
Gold color stands out
Features
Filled and hardened directly in the mouth
Made outside the mouth from a mix of resin and ceramic
Hard and keeps its shine for a long time
Holds up even when made thin and fits the edges well
Wear on opposing teeth
Low
Low
A rough surface can wear down the opposing teeth
Low
Limits
May wear or come off in large molar cavities
With long use, the surface may wear or change color
The right material depends on whether you grind your teeth, have a strong bite, or care about color because the tooth is toward the front. We choose together at your exam.
06°
Who this suits, and who is better off with other treatment
Good for you if
A large cavity between molars or on the biting surface with thick side walls remaining
An old resin or amalgam filling with open edges that needs replacing
Other treatment is better
Teeth with thin walls or cracks: crown
Molars with a root canal treatment: usually a crown
Severe gum inflammation: gum treatment first
You may not need it now
If the cavity is small, resin is enough
Old fillings with no gaps or decay do not need to be replaced
07°
Side effects and limits
Please read
· Your tooth may be sensitive for a few days to a few weeks after bonding. It usually eases gradually.
· New decay can form at the edges, so flossing and regular check-ups are needed.
· If the decay was deep near the nerve, root canal treatment may become necessary after bonding.
· If you grind your teeth heavily or often chew hard things, the inlay or the remaining walls may break. If you grind, we also recommend a splint.
· If the walls are thin after decay removal, the plan may change to a crown.
FAQ
FAQ
Can I get resin instead of an inlay?
If the cavity is small, resin is better because it removes less tooth. But if a large cavity on a molar's biting surface or between teeth is filled with resin, it can wear or come off under chewing force, so we recommend an inlay.
Should I get an inlay or a crown?
After removing the decay, we decide by looking at the thickness of the remaining side walls, the cusps of the biting surface, and any cracks. If thick walls remain, an inlay works. If they are thin or show cracks, a crown is safer.
What is the difference between a gold inlay and a tooth-colored inlay?
A gold inlay holds up even when made thin and fits the edges well, but its color stands out. A tooth-colored inlay looks natural but may wear or chip depending on the material, so we choose based on the location and your chewing force.
How many visits does an inlay take?
Usually two. On the first day, we remove the decay, take an impression, and seal it temporarily. At the next visit, we check the fit and bond the inlay.
My inlay came off. What should I do?
Please do not throw it away; bring it with you. If it is not broken and there is no decay underneath, we check whether it can be bonded again.
How long does an inlay last?
How long it lasts varies a lot depending on the material, flossing, and chewing habits such as grinding. Checking the edges at regular check-ups lets us find problems while they are small.
Is an inlay covered by health insurance?
An inlay is not covered by Korea's National Health Insurance. Costs by material are listed on the treatment cost guide page.
Evidence and references
Health Insurance Review and Assessment Service (HIRA). Coverage criteria for light-cured composite resin fillings (Notice No. 2023-56). View the source (NHI coverage scope for resin)
Ceramic Dental Clinic cavity exam and treatment process: Main cavities page
Questions from international patients who live in Korea.
Can I use Korean National Health Insurance?
If you are enrolled in Korea's National Health Insurance, insured treatments are billed under the same insurance rules as for other enrollees. Whether a treatment is covered depends on the treatment and the insurance rules, and we tell you before treatment starts. If you are not enrolled, you pay the full fee.
Can I be seen in English?
Yes. The doctor in charge of each field consults with you directly in English, so you do not need an interpreter.
I am in Korea only for a short trip. Can I have this treatment?
It depends on how many visits the treatment needs. An inlay usually takes 2 visits, 1–2 weeks apart. Tell us your travel dates when you contact us, and we will tell you after the examination whether the schedule is realistic.
Results, the number of visits and schedules vary from person to person. More questions: Visiting from abroad.


 X-ray before treatment · April 2026
 After shaping · April 2026
 After treatment · May 2026
 Before treatment · February 2025
 After · Mar 2026
 X-ray before treatment · May 2026
 Before · May 2026
 After treatment · May 2026
 Resin · Inlay
 Onlay · Crown
 Examination
 Decay removal and decision
 Impression and scan
 Fit check
 Bite adjustment